> For the complete documentation index, see [llms.txt](https://edgex-api-advantech.gitbook.io/edgex-api-doc/llms.txt). Markdown versions of documentation pages are available by appending `.md` to page URLs; this page is available as [Markdown](https://edgex-api-advantech.gitbook.io/edgex-api-doc/smart-device-services/windows-lockdown-kiosk.md).

# Windows Lockdown/ Kiosk

## **Content**

* Introduction
* Kiosk Setting
* User Setting

## Introduction

Windows Lockdown/ Kiosk is a standalone tool for device management. Based on the standard client PC’s Kiosk configuration functions.

Note:\
Internet Explorer will go out of support on Windows 10. Please see more detail information of the Microsoft Website. We recommend you transition to Microsoft Edge, and also we demo is using it.

### Runtime requirements

* Microsoft Windows 10 LTSC x64 asks for at least 4GB of RAM

###

### Client Device tool **Lite** Revision History

<figure><img src="https://1210863923-files.gitbook.io/~/files/v0/b/gitbook-x-prod.appspot.com/o/spaces%2F-Ldahy90A1eekcr5A2U8%2Fuploads%2FDV9R7tMBsGntqllZfE5m%2F12.JPG?alt=media&amp;token=f40020dd-2dfa-4bb3-b745-cd88f8b5fddd" alt=""><figcaption></figcaption></figure>

##

## DeviceChecking

### **Create User and login**

After Kiosk service is running, click DeviceChecking icon on desktop, it should automatically jump to the user creation page to open a browser and go tolocalhost:9033/admin/login.

Login: Input Username: admin, Password: admin, click Sign in to login WindowsLockdown / Kiosk.

<div align="left"><figure><img src="https://1210863923-files.gitbook.io/~/files/v0/b/gitbook-x-prod.appspot.com/o/spaces%2F-Ldahy90A1eekcr5A2U8%2Fuploads%2FBay4IEIPgbfutjVMYFje%2F1-1.PNG?alt=media&amp;token=a43092da-5804-4bb4-befd-5133df790cc5" alt=""><figcaption></figcaption></figure></div>

<div align="left"><figure><img src="https://1210863923-files.gitbook.io/~/files/v0/b/gitbook-x-prod.appspot.com/o/spaces%2F-Ldahy90A1eekcr5A2U8%2Fuploads%2FFx1PggPQZ9mzGZf8FE30%2Fhh.PNG?alt=media&amp;token=5aa347ac-8323-492b-a63a-5590fcfd9f12" alt=""><figcaption></figcaption></figure></div>

## **Kiosk Setting**

Kiosk uses the assigned access feature to run a single APP above the lock screen. When the kiosk account signs in, the APP is launched automatically.

### Kiosk Mode

* Shell Launcher&#x20;

(1)  UAC is enabled by default and please turn on Custom Shell manually.

<div align="left"><figure><img src="https://1210863923-files.gitbook.io/~/files/v0/b/gitbook-x-prod.appspot.com/o/spaces%2F-Ldahy90A1eekcr5A2U8%2Fuploads%2FcpDFIRFTMpwRfgfdALtw%2F1-7.PNG?alt=media&amp;token=b151aa5a-2ab9-44f9-bf30-0e57fa2e999a" alt=""><figcaption></figcaption></figure></div>

<div align="left"><img src="https://1210863923-files.gitbook.io/~/files/v0/b/gitbook-x-prod.appspot.com/o/spaces%2F-Ldahy90A1eekcr5A2U8%2Fuploads%2FKubDDE4UGBZCXNaAxNfD%2FKiosk%20mode-aa.JPG?alt=media&amp;token=b0a133ba-ec07-4652-bf99-5a00f9aff401" alt=""></div>

(2) Select User: admin. In Application mode, explorer.exe is the Windows Program Manager and runs in the background of Windows 10 at all times.

<div align="left"><figure><img src="https://1210863923-files.gitbook.io/~/files/v0/b/gitbook-x-prod.appspot.com/o/spaces%2F-Ldahy90A1eekcr5A2U8%2Fuploads%2FrN8xgg3oKGJQEzvwN7qt%2FKiosk%20mode-1.PNG?alt=media&amp;token=ec140097-47b5-4f51-bdb7-b5984230a478" alt=""><figcaption></figcaption></figure></div>

(3) User to select option in dropdown list. MS Edge and MS IE shall runs URL program.

<div align="left"><figure><img src="https://1210863923-files.gitbook.io/~/files/v0/b/gitbook-x-prod.appspot.com/o/spaces%2F-Ldahy90A1eekcr5A2U8%2Fuploads%2FqCObA5zw1vyuuwVtjpzN%2FKiosk%20mode-2.PNG?alt=media&amp;token=0f4aa393-1f15-4e2d-a9f5-1e06ff7af994" alt=""><figcaption></figcaption></figure></div>

(3) Enable/ Disable UAC, please refer below Link:\
<https://articulate.com/support/article/how-to-turn-user-account-control-on-or-off-in-windows-10>

&#x20;

&#x20;                                                                      **Table 1**

<div align="left"><img src="https://1210863923-files.gitbook.io/~/files/v0/b/gitbook-x-prod.appspot.com/o/spaces%2F-Ldahy90A1eekcr5A2U8%2Fuploads%2FxakJcVKAtNmWP8yFzkdN%2Fee.JPG?alt=media&amp;token=5915a9ae-6f8f-43fa-b452-82e3ae5dd429" alt=""></div>

* Logon

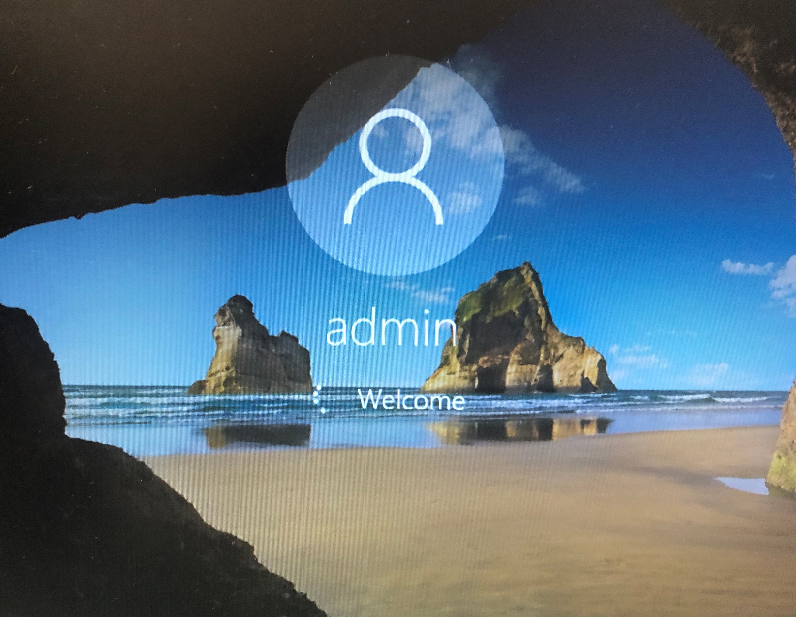
(1) Fill in User name and Password, and then Save. The system shall automatically log on after next reboot.

<div align="left"><img src="https://1210863923-files.gitbook.io/~/files/v0/b/gitbook-x-prod.appspot.com/o/spaces%2F-Ldahy90A1eekcr5A2U8%2Fuploads%2Fqw5pbrDpaNOptj1hcqTE%2Fpp.JPG?alt=media&amp;token=898d2ef1-cccb-49cd-89f9-76558f617f54" alt=""></div>

(2) Domain: need setup a Active Directory Domain Services. Example as below that setup few simple steps to add client PC to AD DA.

* [ ] AD DA

<div align="left"><figure><img src="https://1210863923-files.gitbook.io/~/files/v0/b/gitbook-x-prod.appspot.com/o/spaces%2F-Ldahy90A1eekcr5A2U8%2Fuploads%2FJBdct8KxFEUZ7ZJQ6tk3%2FAdd%20a%20member%20to%20a%20local%20group-6.jpg?alt=media&amp;token=f61ed86d-d6bc-4c95-afa6-dc0dd129ef5c" alt=""><figcaption></figcaption></figure></div>

* [ ] Client PC

![](https://1210863923-files.gitbook.io/~/files/v0/b/gitbook-x-prod.appspot.com/o/spaces%2F-Ldahy90A1eekcr5A2U8%2Fuploads%2FhEByKahzZZf7xtrXuh5g%2Fclient-5.JPG?alt=media\&token=f9d36cc4-5414-4147-bded-5c520a69780b)

&#x20;                                                                                      **Table 2**

<div align="left"><img src="https://1210863923-files.gitbook.io/~/files/v0/b/gitbook-x-prod.appspot.com/o/spaces%2F-Ldahy90A1eekcr5A2U8%2Fuploads%2FEwAHZEm00OgbO21KJmNo%2Fkk.JPG?alt=media&amp;token=196b43a6-487a-448c-8058-e2b7db476d44" alt=""></div>

* Boot Option

(1) Log on customization:&#x20;

* [ ] First logon animation
* [ ] Auto logon UI
* [ ] Blocked shutdown resolver (BSDR)

<div align="left"><img src="https://1210863923-files.gitbook.io/~/files/v0/b/gitbook-x-prod.appspot.com/o/spaces%2F-Ldahy90A1eekcr5A2U8%2Fuploads%2Fqmr6AtKHjGC54VjukjQv%2F22.JPG?alt=media&amp;token=9a772977-6139-4cc1-8a96-dad983afd853" alt=""></div>

&#x20;                                                                                     **Table 3**

<div align="left"><figure><img src="https://1210863923-files.gitbook.io/~/files/v0/b/gitbook-x-prod.appspot.com/o/spaces%2F-Ldahy90A1eekcr5A2U8%2Fuploads%2FuVRZwxM8JjvIXoFKa5Gs%2Fzz.JPG?alt=media&amp;token=73eaeebc-563b-47a9-866d-adfeca1e6177" alt=""><figcaption></figcaption></figure></div>

***First logon animation  is enabled***

<div align="left"><figure><img src="https://1210863923-files.gitbook.io/~/files/v0/b/gitbook-x-prod.appspot.com/o/spaces%2F-Ldahy90A1eekcr5A2U8%2Fuploads%2F4RNgkfdoWpJuRdi1IrMW%2Faa.JPG?alt=media&amp;token=85979faf-9a35-4745-ab29-00eba341e0f8" alt=""><figcaption></figcaption></figure></div>

***Auto logo UI is enabled***

<div align="left"><figure><img src="https://1210863923-files.gitbook.io/~/files/v0/b/gitbook-x-prod.appspot.com/o/spaces%2F-Ldahy90A1eekcr5A2U8%2Fuploads%2Fnfw0KHQLRr0aT2K5AIkU%2F13.png?alt=media&amp;token=306c461e-b130-469f-a33f-062b4ed33b4b" alt=""><figcaption></figcaption></figure></div>

***Blocked shutdown resolver (BSDR) is enabled***

Note: If your PC is running faster or no more apps are running, you cannot see as below pop-up window.

<div align="left"><figure><img src="https://1210863923-files.gitbook.io/~/files/v0/b/gitbook-x-prod.appspot.com/o/spaces%2F-Ldahy90A1eekcr5A2U8%2Fuploads%2FWaYBti9n6hkD5lnPK15I%2Fa1.png?alt=media&amp;token=2a1a6734-a76d-4137-aa67-3c1290f9bf6c" alt=""><figcaption></figcaption></figure></div>

(2) Ctrl + Alt + Del Screen Option

<div align="left"><img src="https://1210863923-files.gitbook.io/~/files/v0/b/gitbook-x-prod.appspot.com/o/spaces%2F-Ldahy90A1eekcr5A2U8%2Fuploads%2FlcN9cchAlBcNegob9NhN%2Fkiosk%20mode_Boot%20option-2.JPG?alt=media&amp;token=57b9240f-7efb-424b-9566-69747ac9fbec" alt=""></div>

&#x20;                                                                                      **Table 4**

<div align="left"><img src="https://1210863923-files.gitbook.io/~/files/v0/b/gitbook-x-prod.appspot.com/o/spaces%2F-Ldahy90A1eekcr5A2U8%2Fuploads%2Fo6Lt7QUbR0SMLFyrRaEA%2F3.JPG?alt=media&amp;token=ff74e9b0-d5bf-407f-8e7c-cd9bacf9ed4f" alt=""></div>

Notice:

Change a password, Administrator allow users to change their password.

1\. To enable Kiosk mode, the **Change a password** function automatically disabled. User hit the key combination Ctrl + Alt + Del, the **Change a password** should always be displayed on the screen but function does not work.

2\. To disable Kiosk mode, the **Change a password** function automatically enabled. User can change their password.\ <br>

### **General Settings**

* General

<div align="left"><figure><img src="https://1210863923-files.gitbook.io/~/files/v0/b/gitbook-x-prod.appspot.com/o/spaces%2F-Ldahy90A1eekcr5A2U8%2Fuploads%2FegDzKtr3GpU8p3x7RCSW%2FGeneral%20Settings-1.PNG?alt=media&amp;token=763eb149-ce66-4f4d-9b13-a3e58bc3e3fa" alt=""><figcaption></figcaption></figure></div>

* Notification

<div align="left"><figure><img src="https://1210863923-files.gitbook.io/~/files/v0/b/gitbook-x-prod.appspot.com/o/spaces%2F-Ldahy90A1eekcr5A2U8%2Fuploads%2FlkyEm5Zyjjo8tCgxVQap%2FGeneral%20Settings-2.PNG?alt=media&amp;token=f834c113-6baf-4458-aefe-4ce758b99b7c" alt=""><figcaption></figcaption></figure></div>

Turn on Open Action Center and Open Notification, Save and reboot the system manually. Enter the desktop and wait few second for EdgeX APP is running. Sliding your finger in from the right side of screen. You can see as below photo that Action Center and Notification function is available.

<div align="left"><img src="https://1210863923-files.gitbook.io/~/files/v0/b/gitbook-x-prod.appspot.com/o/spaces%2F-Ldahy90A1eekcr5A2U8%2Fuploads%2FQueK96qeW9OOZyawbptu%2FGeneral_Action%20center_Notifications%20center-1.jpg?alt=media&amp;token=9f163863-b6ee-4071-9e9f-61ec18ab7278" alt=""></div>

&#x20;                                                                                     **Table 5**

![](https://1210863923-files.gitbook.io/~/files/v0/b/gitbook-x-prod.appspot.com/o/spaces%2F-Ldahy90A1eekcr5A2U8%2Fuploads%2FgR2JngEaLBobUO9nCTBD%2Fyy.JPG?alt=media\&token=658a0776-fa82-41fd-94b2-651c9594e18b)

* USB Storage Control\
  Turn on/ off below function, and then reboot the system manually. The following three options are available.

<div align="left"><figure><img src="https://1210863923-files.gitbook.io/~/files/v0/b/gitbook-x-prod.appspot.com/o/spaces%2F-Ldahy90A1eekcr5A2U8%2Fuploads%2FqkNQEBdcbz7Jky7VvfLS%2FGeneral%20Settings-3.PNG?alt=media&amp;token=01a2d823-3b54-4cc3-8971-a8dca0f2cf53" alt=""><figcaption></figcaption></figure></div>

&#x20;                                                                                &#x20;

&#x20;                                                                                      **Table 6**

<div align="left"><img src="https://1210863923-files.gitbook.io/~/files/v0/b/gitbook-x-prod.appspot.com/o/spaces%2F-Ldahy90A1eekcr5A2U8%2Fuploads%2FGZiUKnyzVT4eu3P2NacD%2Fyyy.JPG?alt=media&amp;token=fd78ddef-b7ad-4561-85cb-ed299c193ceb" alt=""></div>

### **Keyboard**

Enable the touch keyboard and no USB keyboard attached, make sure the virtual keyboard works find before you use our utility.

<div align="left"><figure><img src="https://1210863923-files.gitbook.io/~/files/v0/b/gitbook-x-prod.appspot.com/o/spaces%2F-Ldahy90A1eekcr5A2U8%2Fuploads%2F1RrdP6Wg7vMtHNwJlSFi%2FEnabled%20touch%20KB.PNG?alt=media&amp;token=89b581f7-2380-4736-9c13-a62b2bfbb119" alt=""><figcaption></figcaption></figure></div>

* Virtual Keyboard

<div align="left"><figure><img src="https://1210863923-files.gitbook.io/~/files/v0/b/gitbook-x-prod.appspot.com/o/spaces%2F-Ldahy90A1eekcr5A2U8%2Fuploads%2FkBwNmfCgqc4cKhU7ZFH3%2FKB-1.PNG?alt=media&amp;token=8dc1e85d-e6d6-4d85-9dd7-3ad0c543d11c" alt=""><figcaption></figcaption></figure></div>

* Keyboard Filter

Open DeviceChecking > Kiosk Setting > Keyboard, Predefined keys should appear.

<div align="left"><figure><img src="https://1210863923-files.gitbook.io/~/files/v0/b/gitbook-x-prod.appspot.com/o/spaces%2F-Ldahy90A1eekcr5A2U8%2Fuploads%2FHdXkzAlnE4Me36CLmdQG%2FKB-2.PNG?alt=media&amp;token=e419d7ec-9305-40af-bb60-75440e0f26b7" alt=""><figcaption></figcaption></figure></div>

&#x20;                                                                                    **Table 7**

<div align="left"><figure><img src="https://1210863923-files.gitbook.io/~/files/v0/b/gitbook-x-prod.appspot.com/o/spaces%2F-Ldahy90A1eekcr5A2U8%2Fuploads%2FE5KQzoPBO6247bM9h35A%2Fss.JPG?alt=media&amp;token=f2c9dcda-6c02-4a85-8bb6-ea4876bc3ccf" alt=""><figcaption></figcaption></figure></div>

**Note: Keyboard Scan Code Table - Microsoft**

<https://download.microsoft.com/download/1/6/1/161ba512-40e2-4cc9-843a-923143f3456c/scancode.doc>

### **Unified Write Filter**

Unified write filter (UWF), please refer to the link below: <http://woshub.com/using-unified-write-filter-uwf-windows-10/>&#x20;

Note: Please disabled UWF first when you need to try other functions.

<div align="left"><figure><img src="https://1210863923-files.gitbook.io/~/files/v0/b/gitbook-x-prod.appspot.com/o/spaces%2F-Ldahy90A1eekcr5A2U8%2Fuploads%2Fad7Am8Lr4G6J6cOu0nbc%2FUWF-1.PNG?alt=media&amp;token=d1810b57-34ee-4ac2-9a26-a949969a20d9" alt=""><figcaption></figcaption></figure></div>

1. Click **Advanced Settings** button to setup Overlay Setting, File Exclustion, and Registry Exclusion. Please refer to the link below: <https://learn.microsoft.com/en-us/windows-hardware/customize/enterprise/uwfoverlay>

<div align="left"><figure><img src="https://1210863923-files.gitbook.io/~/files/v0/b/gitbook-x-prod.appspot.com/o/spaces%2F-Ldahy90A1eekcr5A2U8%2Fuploads%2Fv3kQleVr58TwxxWXBrgS%2Fpp.png?alt=media&amp;token=01a81dd1-7e0a-4534-828d-ed5bf1488508" alt=""><figcaption></figcaption></figure></div>

2\. Example: set Disk overlay size is 2048 MB.

<div align="left"><figure><img src="https://1210863923-files.gitbook.io/~/files/v0/b/gitbook-x-prod.appspot.com/o/spaces%2F-Ldahy90A1eekcr5A2U8%2Fuploads%2FzsbanI5lrlN0Tq9YSNab%2F1.PNG?alt=media&amp;token=9f428c31-4c07-4c80-b541-097be142a912" alt=""><figcaption></figcaption></figure></div>

3\. You can check the UWF status using this command: uwfmgr.exe get-config.

<div align="left"><figure><img src="https://1210863923-files.gitbook.io/~/files/v0/b/gitbook-x-prod.appspot.com/o/spaces%2F-Ldahy90A1eekcr5A2U8%2Fuploads%2F8yvWRcYLYxtbBvZh0e15%2F2.PNG?alt=media&amp;token=7b19fb8d-2163-449b-8f8d-a00410366db1" alt=""><figcaption></figcaption></figure></div>

4\. Setup File Exclusion, when a file or folder is in the exclusion list for a volume, all writes to that file or folder bypass UWF filtering.

<div align="left"><figure><img src="https://1210863923-files.gitbook.io/~/files/v0/b/gitbook-x-prod.appspot.com/o/spaces%2F-Ldahy90A1eekcr5A2U8%2Fuploads%2FMnu2jKK11iRJ7nSLRnPC%2FUWF-2.PNG?alt=media&amp;token=0a722fb5-826e-4a9e-b752-1df00809b026" alt=""><figcaption></figcaption></figure></div>

5\. Registry Exclusion supports below list for a volume, excluding a registry key from filtering also excludes all subkeys from filtering.&#x20;

<div align="left"><figure><img src="https://1210863923-files.gitbook.io/~/files/v0/b/gitbook-x-prod.appspot.com/o/spaces%2F-Ldahy90A1eekcr5A2U8%2Fuploads%2FWxJFRswbYWeqYfg9CcB4%2FUWF-3.png?alt=media&amp;token=5449a485-9d0f-48ff-a2e6-ca6c1a81959d" alt=""><figcaption></figcaption></figure></div>

<div align="left"><figure><img src="https://1210863923-files.gitbook.io/~/files/v0/b/gitbook-x-prod.appspot.com/o/spaces%2F-Ldahy90A1eekcr5A2U8%2Fuploads%2FCNB6hRCKdzfhbDonyZKu%2FUWF-3-1.PNG?alt=media&amp;token=92136e1b-fc7a-4fcf-9f2d-2407e897d6cd" alt=""><figcaption></figcaption></figure></div>

6\. After setup "Advanced Settings". To enable Disk Protection disk.

7\. Turn on Enable Disk Write Filter, then click Save button

8\. Reboot your device.

<figure><img src="https://1210863923-files.gitbook.io/~/files/v0/b/gitbook-x-prod.appspot.com/o/spaces%2F-Ldahy90A1eekcr5A2U8%2Fuploads%2F4YBFbbIb3YnmZjjJqIvh%2FUWF.PNG?alt=media&amp;token=cbf6d270-9343-434b-8c82-73414581f6cf" alt=""><figcaption></figcaption></figure>

&#x20;                                                                                      **Table 8**

<div align="left"><figure><img src="https://1210863923-files.gitbook.io/~/files/v0/b/gitbook-x-prod.appspot.com/o/spaces%2F-Ldahy90A1eekcr5A2U8%2Fuploads%2FtqGP5AAxiqGdguAkfKm6%2Fgood.JPG?alt=media&amp;token=63690101-4804-4064-b01f-c5074de22f4a" alt=""><figcaption></figcaption></figure></div>

### **App Locker**

App Locker, please refer to the link below: [Working with AppLocker rules (Windows) - Windows security | Microsoft Learn](https://apc01.safelinks.protection.outlook.com/?url=https%3A%2F%2Flearn.microsoft.com%2Fen-us%2Fwindows%2Fsecurity%2Fthreat-protection%2Fwindows-defender-application-control%2Fapplocker%2Fworking-with-applocker-rules\&data=05%7C01%7CGordon.Chang%40advantech.com.tw%7Cd91bee0f03364a0c8f9708dabd42b048%7Ca77d40d9dcba4ddab5715f18e6da853f%7C0%7C0%7C638030391381488943%7CUnknown%7CTWFpbGZsb3d8eyJWIjoiMC4wLjAwMDAiLCJQIjoiV2luMzIiLCJBTiI6Ik1haWwiLCJXVCI6Mn0%3D%7C3000%7C%7C%7C\&sdata=zUm9qSAqVcAQjWfeuV2jZuvrFDrgqHkyU4cAkAEpPUQ%3D\&reserved=0)

<figure><img src="https://1210863923-files.gitbook.io/~/files/v0/b/gitbook-x-prod.appspot.com/o/spaces%2F-Ldahy90A1eekcr5A2U8%2Fuploads%2Fw2jpN43UKqyjgAaLtK75%2Fa.png?alt=media&amp;token=2e67ed2c-b540-498b-bb7f-838d81199fba" alt=""><figcaption></figcaption></figure>

1. Click App Locker button to enable this function.
2. AppLocker helps you control which apps users can run.&#x20;

<div align="left"><figure><img src="https://1210863923-files.gitbook.io/~/files/v0/b/gitbook-x-prod.appspot.com/o/spaces%2F-Ldahy90A1eekcr5A2U8%2Fuploads%2F9GvLHGvJvQhTbiaeTHMb%2FApp%20Locker.PNG?alt=media&amp;token=5ee73770-10fe-40eb-b6e1-478ee6cdaa7e" alt=""><figcaption></figcaption></figure></div>

&#x20;                                                                                    **Table 9**

<div align="left"><figure><img src="https://1210863923-files.gitbook.io/~/files/v0/b/gitbook-x-prod.appspot.com/o/spaces%2F-Ldahy90A1eekcr5A2U8%2Fuploads%2F0iou1woeSsZDFAHJhe4J%2Fxx.JPG?alt=media&amp;token=d9befaf2-99f2-49e9-b365-7a7c2e793556" alt=""><figcaption></figcaption></figure></div>

## **User Setting**

### Admin

Click User Setting > Alarm Setting > Admin. Edit Name, Nickname, and Password.

<div align="left"><img src="https://1210863923-files.gitbook.io/~/files/v0/b/gitbook-x-prod.appspot.com/o/spaces%2F-Ldahy90A1eekcr5A2U8%2Fuploads%2FtuMG6VjcvFuTz690krlk%2F14.JPG?alt=media&amp;token=f8bd334e-1206-4a68-8a25-11cc1c02ce3c" alt=""></div>